ASP.NET Core MVC is a strong tool for building modern web apps with .NET. It uses the Model-View-Controller (MVC) pattern, dividing your app into three parts:
-
Model: This handles data and logic.
-
View: This shows the user interface.
-
Controller: This manages user requests and interactions.
ASP.NET Core MVC has several perks for web development:
- Clear organization: It neatly separates different parts of the app, making it easier to manage and update.
- Choice in UI building: You can pick between Razor Pages or traditional MVC views to design your interface.
- Wide range of tools: There are lots of libraries and tools available to add extra features to your app.
- Fast and scalable: It’s designed to work quickly and handle lots of users, perfect for modern web apps.
With ASP.NET Core’s MVC setup, developers can make sturdy, easy-to-update web apps with a clear divide between data, logic, and design.
Visual Studio
If you’re using Visual Studio, the process becomes extremely simple. You start by defining your data model. Then, with just a right-click on the model, you can access a range of built-in functions to generate templates for your views, controllers, authentication and database. Visual Studio handles the heavy lifting, generating good quality code and gives you a complete application, it’s almost magical.
VSCode
You can achieve the same result with dotnet-sdk and VSCode. In my opinion, making the ASP.NET Core MVC app in VSCode helps you better understand how the app is built. In this blog post, we will go through the process of making a simple mvc app. The steps are simple:
-
define applications data model
-
Scaffold the data model to generate views and controllers
-
generate and run migration to create your database and incrementally update it
Creating ASP.Net MVC project in VSCode
First we need to install some dotnet tools and vscode-sqlite extension to get started.
- install
vscode-sqliteextension - run these commands to install necessary tools:
dotnet tool uninstall --global dotnet-aspnet-codegenerator
dotnet tool install --global dotnet-aspnet-codegenerator
dotnet tool uninstall --global dotnet-ef
dotnet tool install --global dotnet-ef
What is Entity Framework Core (EF Core)
EF Core is an object-relational mapper (ORM). ORMs simplify data access by providing a layer between your code and the database, in our case sqlite. EF Core acts as a data access API, allowing you to interact with the database using POCOs (plain old CLR objects) from the .NET framework and LINQ syntax for data manipulation.
dotnet-aspnet-codegenerator
aspnet-codegenerator, is going to help us by generating views- and controllers-code.
Create new mvc project
We are going to make a simple crud app to work with a list of products. The command below starts a new ASP.NET Core MVC project without authentication, then builds and run the project.The mvc app uses Razor and Bootstrap framework for html and styling.
# -au stands for Authentication
dotnet new mvc -o <projectName> -au None
cd <projectName>
dotnet build
dotnet run

# example:
dotnet new mvc -o Storage -au None
cd Storage
Adding Entity Framework Packages
Now you need to add necessary packges:
dotnet add package Microsoft.EntityFrameworkCore.Design
dotnet add package Microsoft.EntityFrameworkCore.SQLite
dotnet add package Microsoft.VisualStudio.Web.CodeGeneration.Design
dotnet add package Microsoft.EntityFrameworkCore.SqlServer
dotnet add package Microsoft.EntityFrameworkCore.Tools
Part-1 Create Data Model
Data model defines the structure and behavior of the data the application works with. Data model interacts with both the controller and the view components. So we start by creating a file under Models directory. Here is data model for our example app “Storage”. It uses DataAnnotations to add attributes to data, like range of price property. The [key] to tell the database “Id” is primary key.
// Product.cs
using System.ComponentModel.DataAnnotations;
namespace Storage.Models
{
    public class Product
    {
        [Key]
        public int Id { get; set; }
        public string? Name { get; set; }
        public string? Description { get; set; }
        public string? Category { get; set; }
        public string? Shelf { get; set; }
        // date with no time
        [DataType(DataType.Date)]
    public DateTime OrderDate { get; set; }
        // price can be between 1 and 500
    [Range(1, 500)]
    public int Price { get; set; }
    [Range(1, 10000)]
    public int Count { get; set; }
    }
}
Part-2 Scaffolding
Scaffolding in ASP.NET MVC is a powerful tool to automate the generation of basic CRUD code templates for controllers, views and the data access logics, based on the data model. We have already installed necessary tools and packages so we start Scaffolding our data model. In this example we use “Storage” as Namespace and model is “Product” which you can change them.
The command below tells dotnet to use apsnet-codegenerator tool to:
- create a controller named “ProductsController” based on data model “Product” and place it inside “Controllers directory”
- create a “DbContext” and name it “StorageContext” inside “Data directory”
- use default layout for views which is “Razor view”
- use sqlite as database
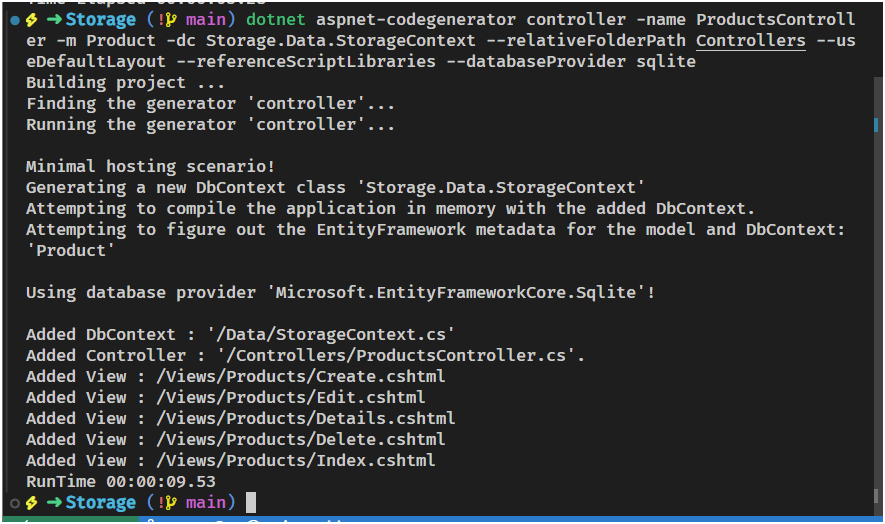
dotnet aspnet-codegenerator controller -name ProductsController -m Product -dc Storage.Data.StorageContext --relativeFolderPath Controllers --useDefaultLayout --referenceScriptLibraries --databaseProvider sqlite
Scaffolding generates:
- Controllers/ProductsController.cs
- Razor view files for Create, Delete, Details, Edit, and Index pages:
Views/Movies/*.cshtml - A DbContext class Data/StorageContext.cs
What is DbContext
DbContext is a built in class that provides methods to configure options, connection string, logging and the model that is used to map your domain to the database. DbContext:
-
Represent an active session with the database.
-
Save and query instances of entities.
-
Include properties of type
DbSet<T>that represent tables in the database.
Part-3 Generate and run a migration
EF Core Migrations is used to incrementally update the database schema to keep it in sync with applications data model as it changes as new features implements. It does it while preserving existing data in the database. After a new migration is generated, it can be applied to a database in various ways. EF Core records all applied migrations in a special history table. The history table keeps a record of which migrations have been applied.
Generate migrations
dotnet-ef migrations add <name> -c <name of DbContext>

#example:
dotnet-ef migrations add init -c StorageContext
And to undo the migrations:
dotnet-ef migrations remove
Applying the migrations and run it
This command applies the migration and creates a .db file in project directory.
dotnet-ef database update --context StorageContext
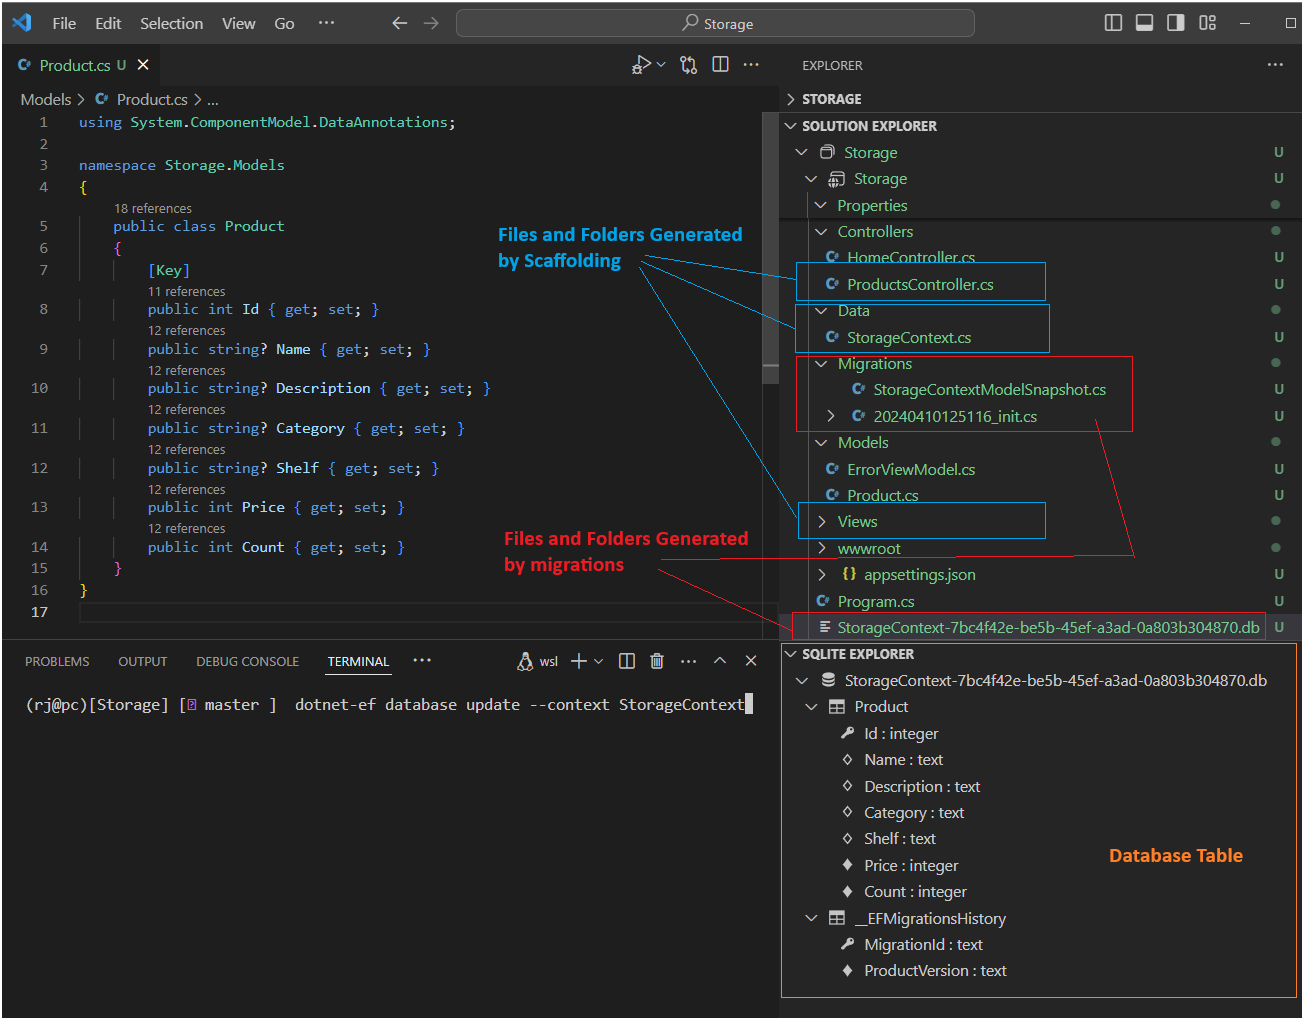
And to view the database table, install sqlite extension in vscode. Right-click on the .db file and choose open. It will open it in “sqlite explorer” (update november 2024 => instead of sqlite explorer, use “SQLite3 Editor” extension) that shows your database table. and you can click on “Show Table” which opens your table in the editor window.
Insert some data into database
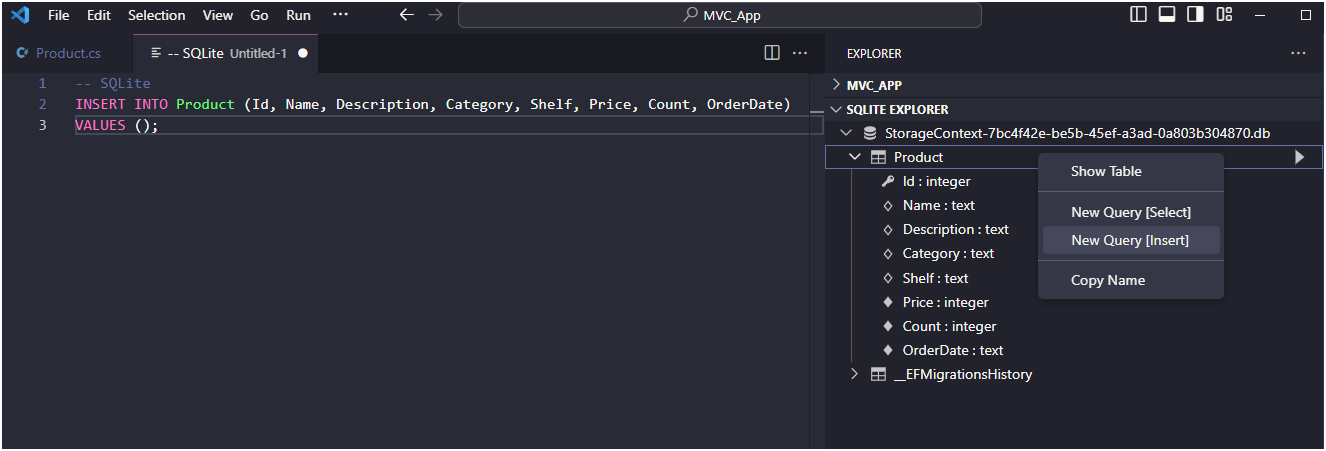
To populate the database with some data, in sqlite explorer right click on table name and choose “New Query”. The extension opens a window with sql insert query that you can fill in your data and right click in empty place and choose run query.
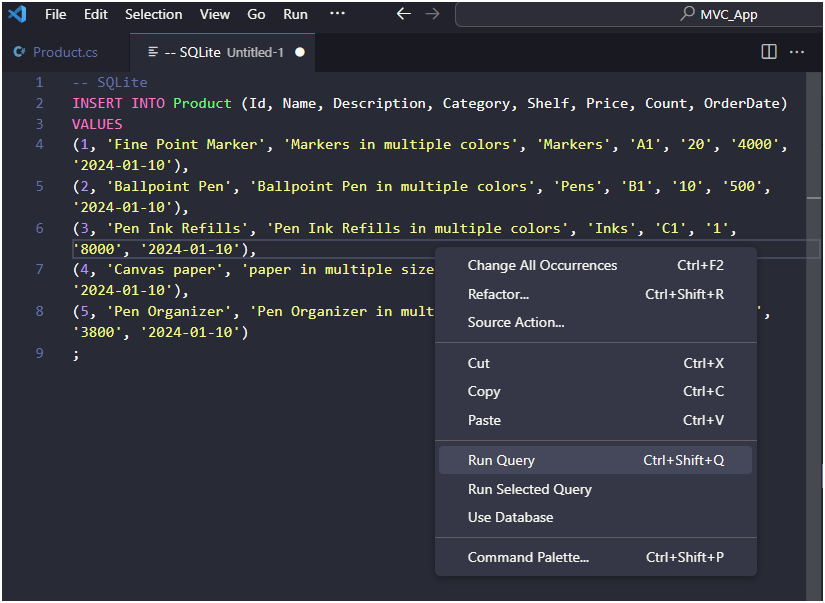
Here is some dummy data to insert into database:
INSERT INTO Product (Id, Name, Description, Category, Shelf, Price, Count, OrderDate)
VALUES
(1, 'Fine Point Marker', 'Markers in multiple colors', 'Markers', 'A1', '20', '4000', '2024-01-10'),
(2, 'Ballpoint Pen', 'Ballpoint Pen in multiple colors', 'Pens', 'B1', '10', '500', '2024-01-10')
;
Last part Editing navigation links
Now you only need to add a link to your products page. Go to Views -> Shared -> _Layout.cshtml. Then build and run your project:
<li class="nav-item">
    <a class="nav-link text-dark" asp-area="" asp-controller="Products" asp-action="Index">Products</a>
</li>
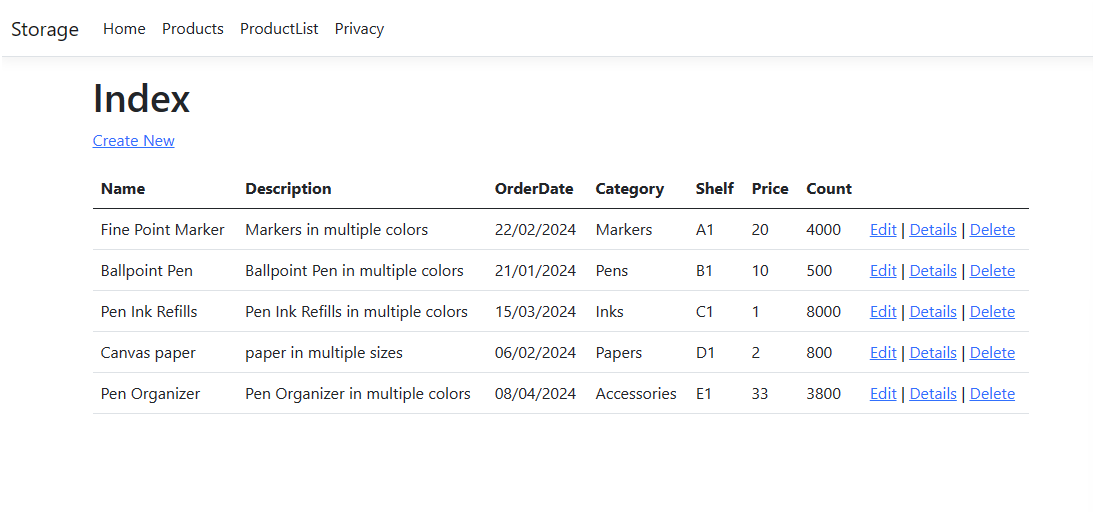
Products Page:
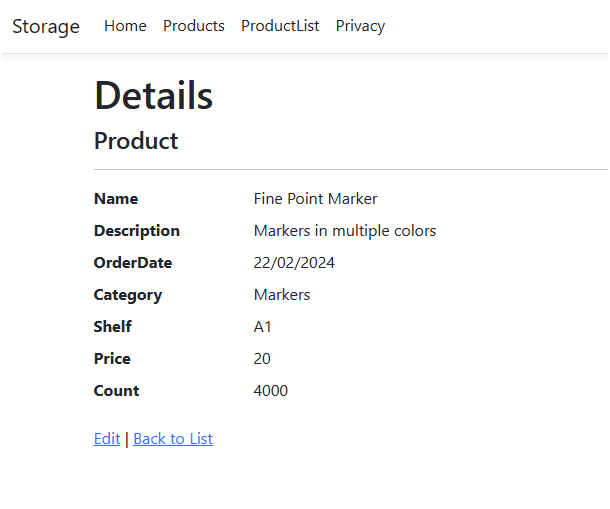
Details Page:
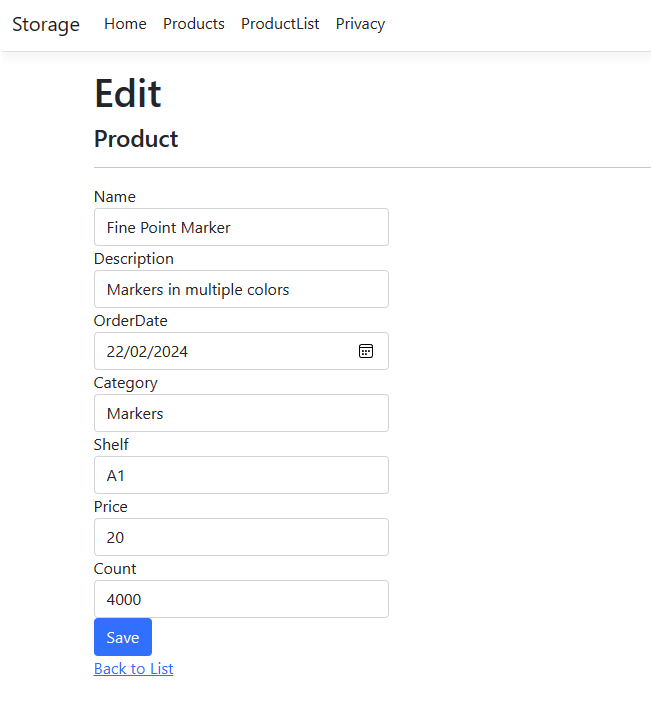
Edit Page: